

 0 Comments
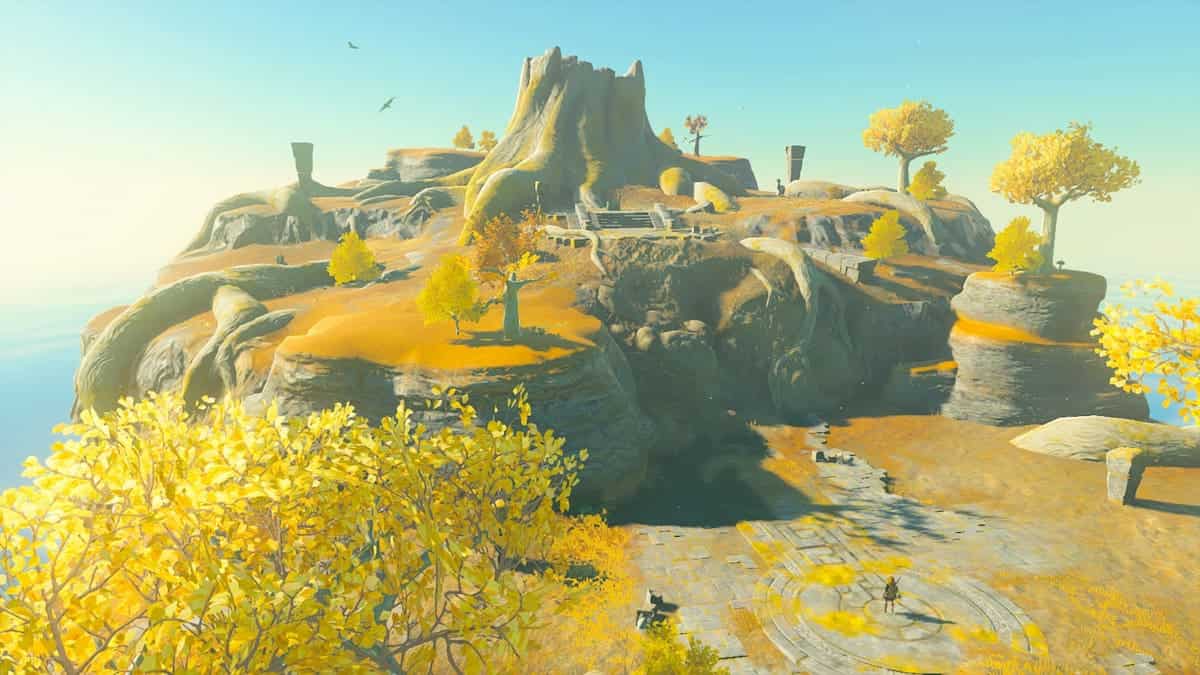
Players who enjoyed The Legend of Zelda: Breath of the Wild are no strangers to shrines, the puzzle rooms that dot the landscape in Tears of the Kingdom. Rewarding players with a currency that allows them to raise their hearts and stamina, completing shrines will be core to any playthrough of the game. Outside the tutorial, one of the first shrines players may find themselves at is the Jiosin shrine.
This guide will walk you through everything you need to know about the Jiosin shrine: How to find it, how to complete it, and what rewards lie within the Shrine on the surface ground of Hyrule.
Jiosin Shrine Tears Tears of the Kingdom Complete Guide
This guide will show you the set of steps needed to solve the first and second puzzle in the Jiosin Shrine. The first and second area require different shapes and construct materials, whether it is rectangles, Xs, or a double cube. You will need to use different angles to solve the first and second part of Jiosin Shrine to fit them through the different shape holes.
Where is the Jiosin Shrine Location?
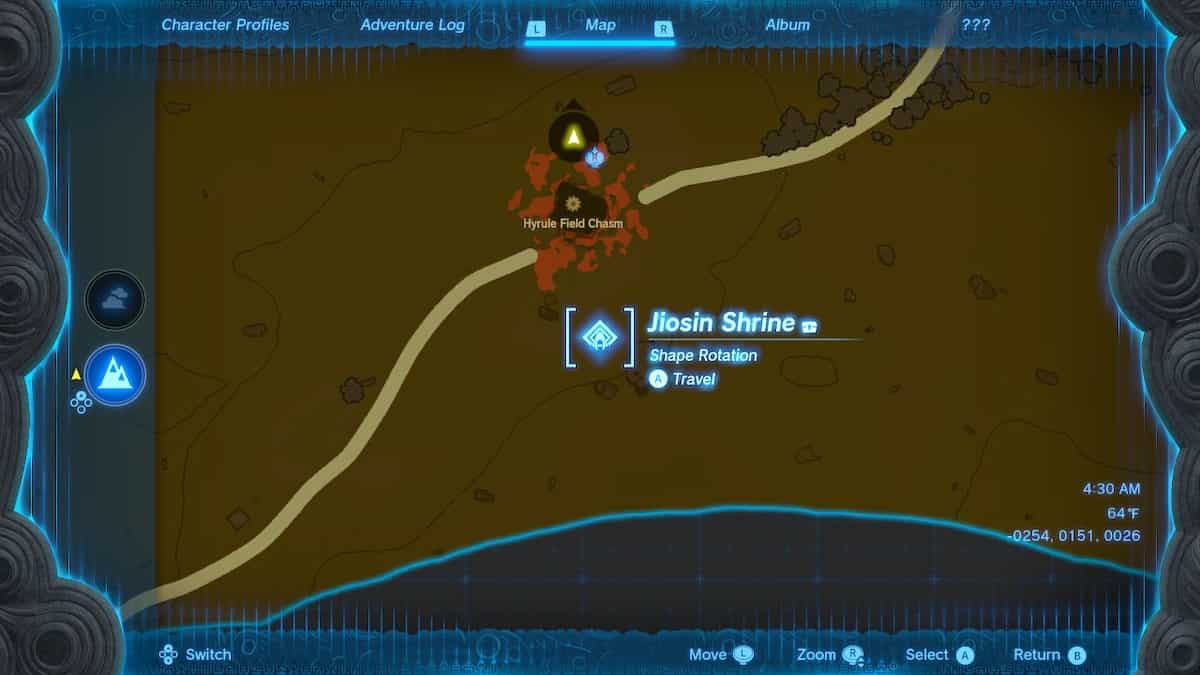
The Jiosin Shrine (Shape Rotation) is located in Hyrule Field, next to the Hyrule Field Chasm. This is directly south of Hyrule Castle and Lookout Landing, making it an early shrine. Interacting with the Shrine will give you a fast travel medallion.
How is the Jioson Shrine Puzzle Solved?
The Jiosin Shrine Puzzle is all about learning to rotate objects using the Ultrahand ability. There are two main rooms to get through in this puzzle, each with their own rotation-based answers.
Room One
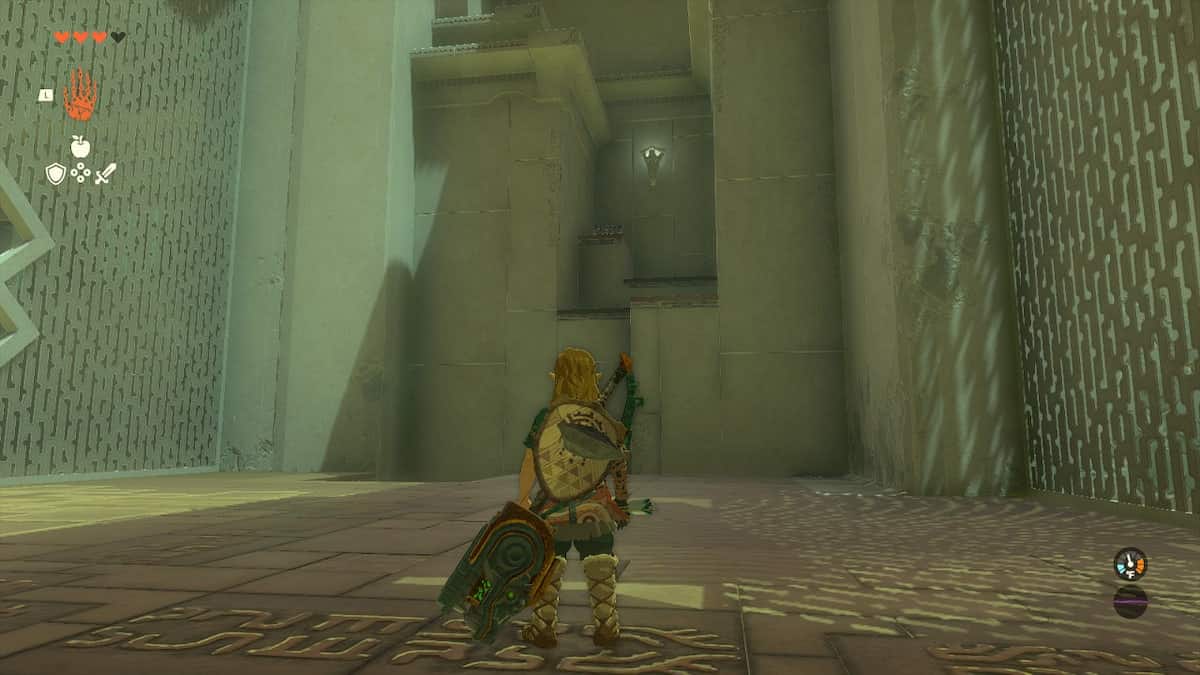
Upon entering the shrine, you will see a doorway across a gap in front of you, and a wall with an X-shaped sigil in to the left. This is the first shape puzzle in the first area.
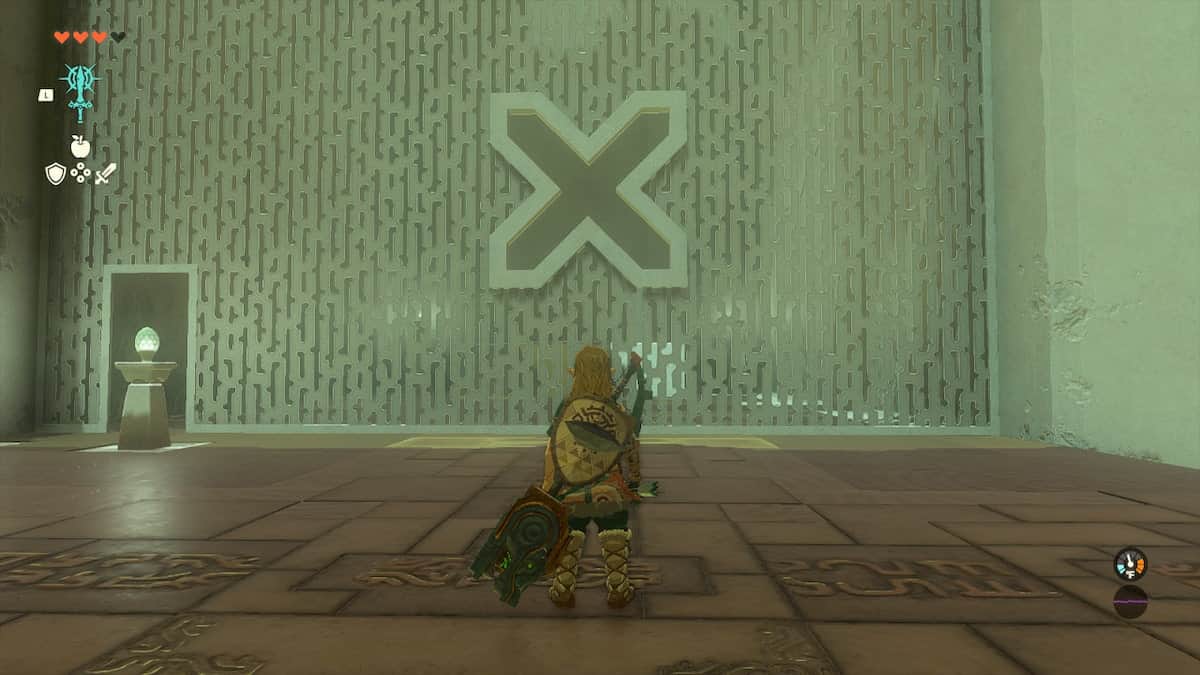
Go through the door on the left. There you will find an X-shaped building piece that can be used as a bridge to cross the gap to the other doorway.
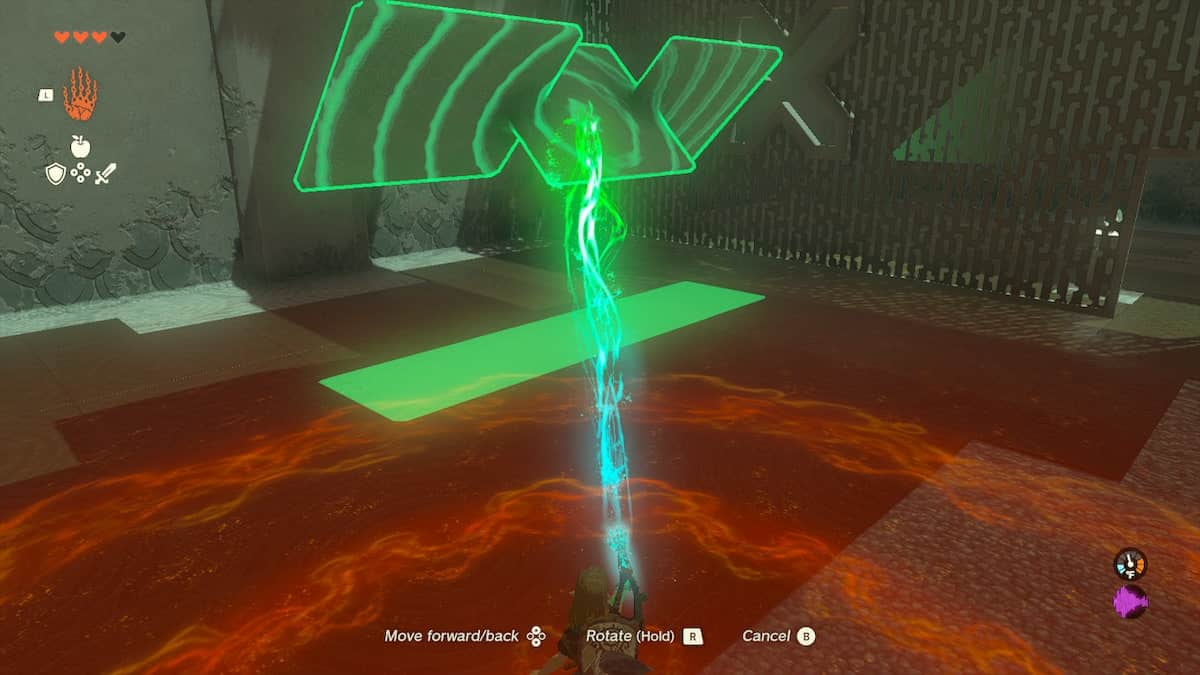
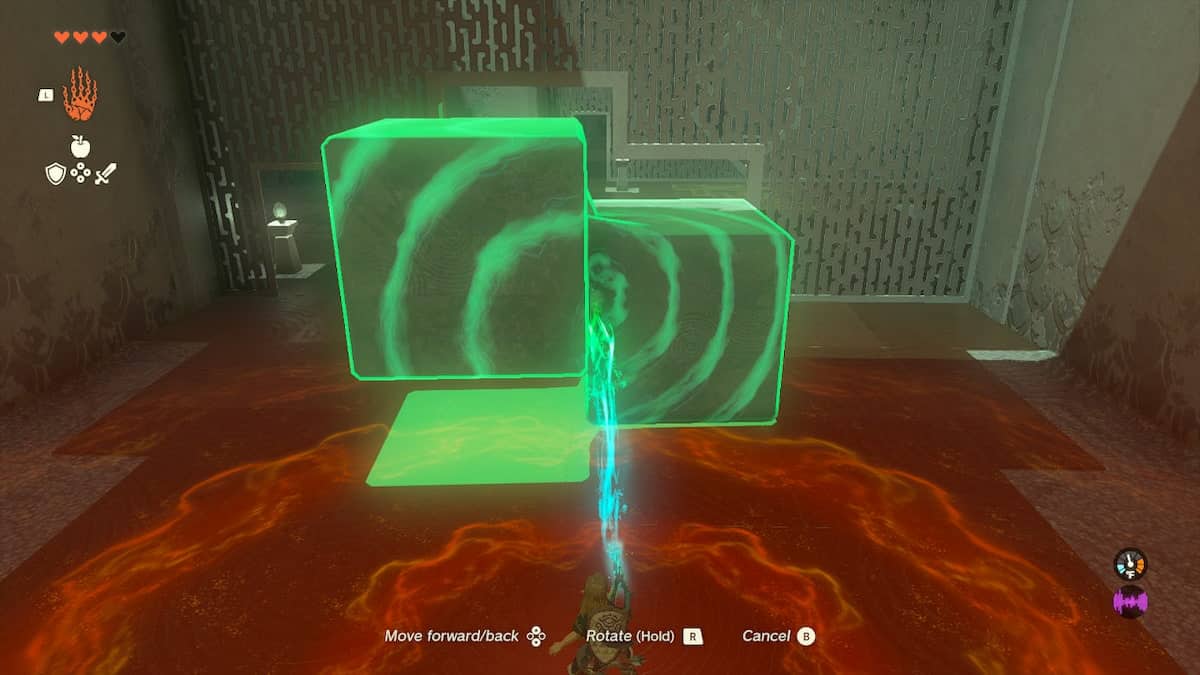
You will have to rotate the object to get it through the X-shaped hole in the wall. To rotate an item, follow these steps:
- Hold L and select the Ultrahand ability
- Look at the X-shaped building piece and click A
- Raise the piece up to the X in the wall
- Rotate the piece to fit through by holding B and using the D-pad to rotate the piece
The piece should look like this when rotated correctly:
Move the piece through the wall, then drop it. Move back into the main room, then use Ultrahand to place the piece over the gap, making a bridge.

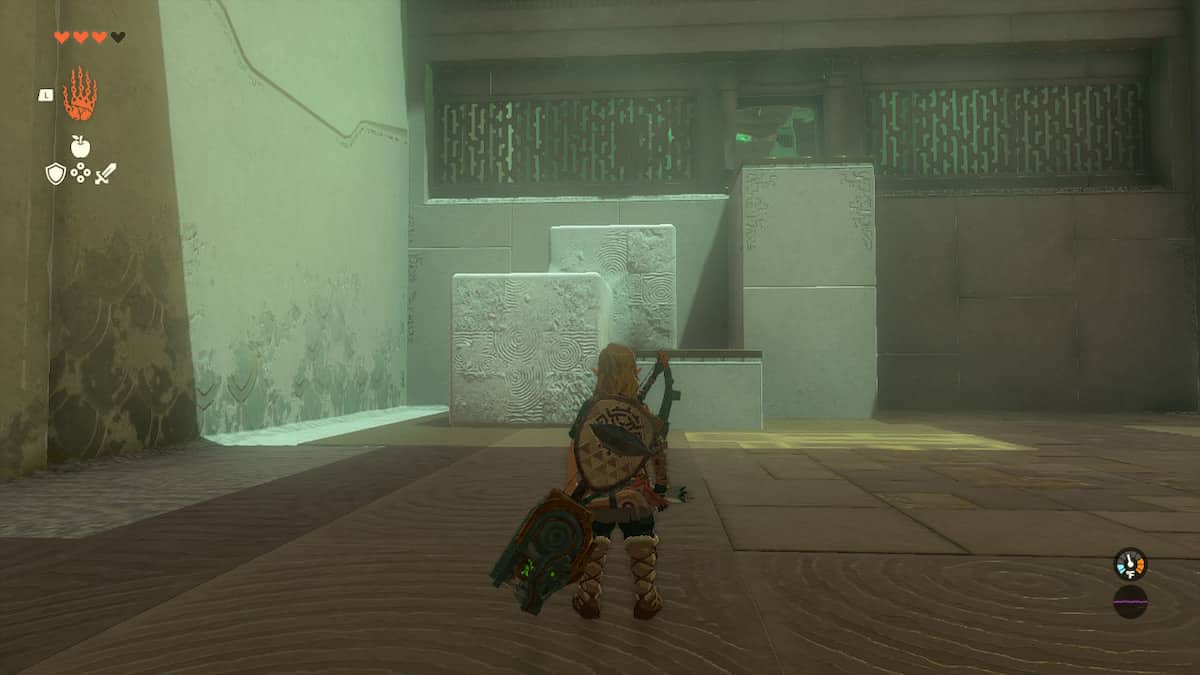
Room 2
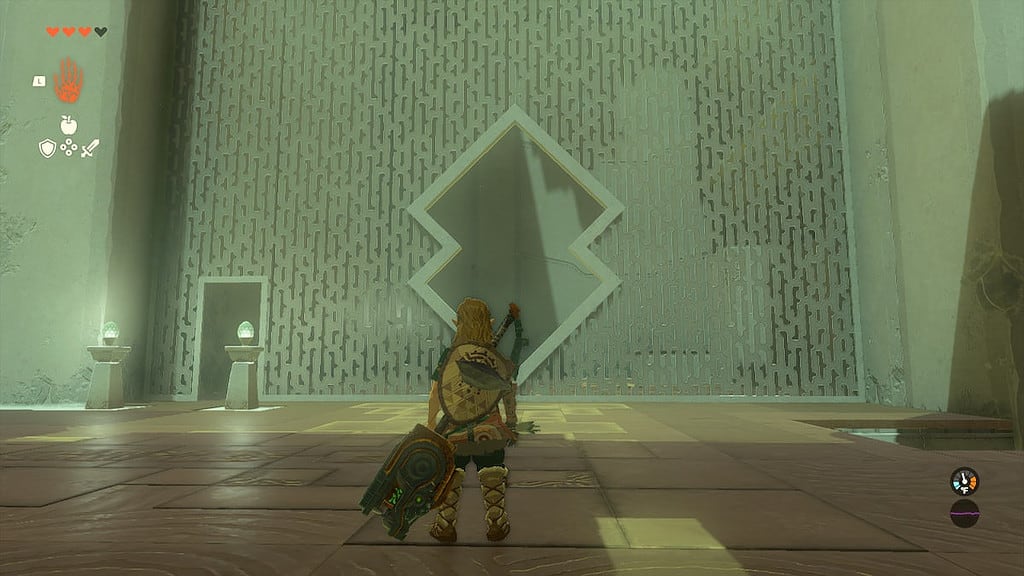
Upon entering this room, players will see a bonus chest containing a Hasty Elixir before them on the side of the wall on the higher platform.
To the right will be a room with a building piece in it, with a blocky looking hole in the wall.

On the left is a room with a double diamond shaped hole in the wall.
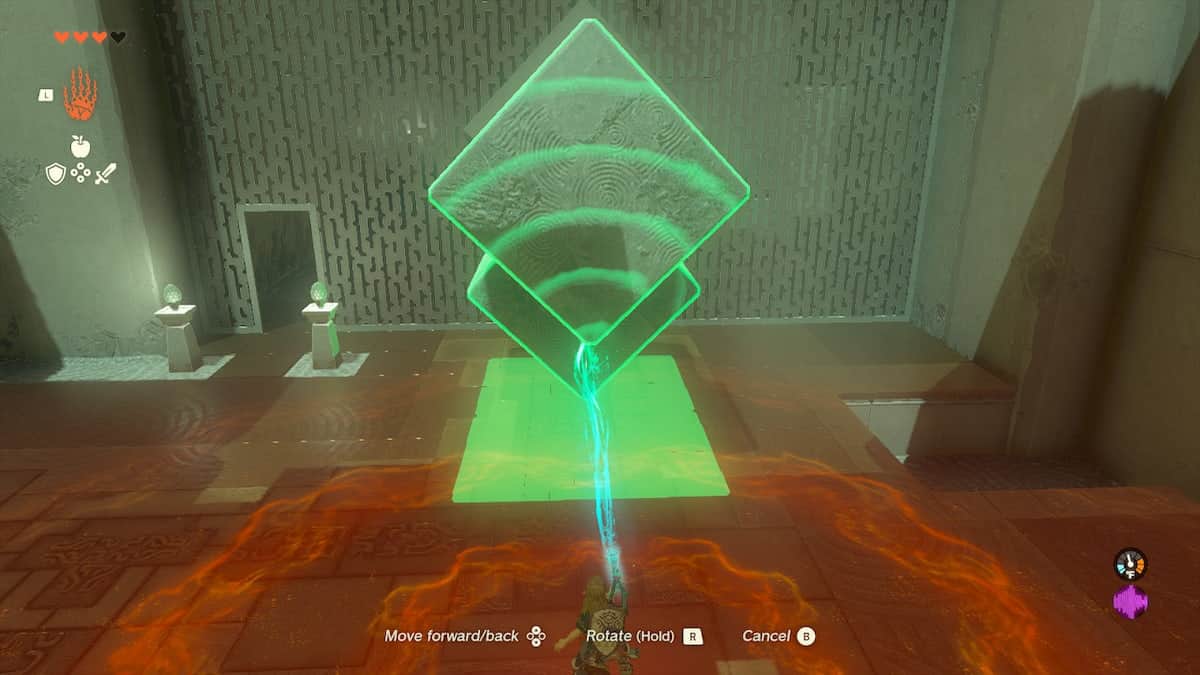
Go into the room on the right and use Ultrahand to rotate the piece, using the instructions listed above. The piece should be rotated to look like the diamond shape objects to get through the opening.
Once you have made it through the wall, you can use the piece to reach the bonus chest. To do so, go to the end of the room and set the piece down against the wall in this pattern:

Then jump up to the chest to receive a Hasty Elixir.
To get the piece into the next room it will have to be rotated once more. Pick up the block using Ultrahand and rotate it until it looks like the image below:
Pass the block through the opening in the wall. The last step will be to rotate the object so that you can reach the top of the platform before you. Rotate the block and push it against the existing terrain, until it looks like the image below:
More N4G Unlocked: Is Zelda Evil in Tears of the Kingdom?
Then you must simply jump on the blocks and walk through the entranceway. Beyond that is the end of the shrine’s exit, where you will be fully healed and rewarded with a Light of Blessing. These can be used to increase stamina or gain heart containers which will help you in the rest of the game.